Crafting Your World with Bullet Journals: A Comprehensive Guide for BUJO Beginners
By: Robin Van Auken
Skip to Section
- Article Summary
- What Are Bullet Journals?
- The Art of Organization: Where Function Meets Beauty
- Chapter Topic Ideas for Bullet Journals
- Designing Bullet Journal Chapters
- How to Use Washi Tape in Your Bullet Journal
- Creative Additions to Bullet Journaling
- A Few Fun Supplies for Bullet Journaling and Art
- Bullet Journalers to Follow
Article Summary
Bullet journals started as a way to keep your tasks organized. Now they’ve evolved into full-blown creative playgrounds. This piece is equal parts beginner’s guide, personal confession, and art supply rabbit hole—with tips on building your own system that actually sticks.
If your current planner looks like a haunted checklist graveyard, this article walks you through how to fix that—and have fun doing it. You’ll see how bullet journaling can combine daily structure with sketching, painting, storytelling, and even a bit of museum research (yes, really).
- You’ll learn how to design bullet journal chapters around work, hobbies, health, money, travel, and creativity—with layouts that reflect each one’s mood and function.
- You’ll see how to keep your journal cohesive by reusing borders, color palettes, tabs, and recurring design motifs—even when each chapter has a life of its own.
- Washi tape gets its moment: borders, trackers, page tabs, bookmarks, pocket-makers—you’ll want to keep a craft knife nearby.
- You’ll pick up dozens of optional extras, from calligraphy spreads and collage pages to pop-up tabs, habit trackers, travel diaries, and visual playlists.
- You’ll also get a full list of pens, paints, sketchbooks, storage cases, and accounts to follow if you’re ready to level up—or just scroll through some beautiful chaos.
My desk drawers and closets contain many notepads, notebooks, and journals. It’s how I’ve always collected my thoughts. I consume a lot of paper, and my notepads are mostly random, disjointed, and illegible. I take a lot of notes in meetings—the brain dump of a technical writer. I seldom look back through them because they are there to create an impression, and I’m great at memorization.
My journals, however, are different. These are personal and lengthy, even though the handwriting is still illegible. These are the stories of my life written intermittently and with no elaboration or celebration. They’re generally nondescript books of all sizes and colors and seem to be purchased spontaneously.
But this is changing. During the past few years, I’ve been learning more about art and how to draw and paint watercolors. Lately, these sketches and colors are bleeding into my notebooks and journals.
I hadn’t imagined a canvas where productivity could meet creativity. A space where my thoughts and tasks could share a page with art. Then, I discovered the world of illustrated traveler’s notebooks and bullet journals.
I dove into the deep end and added new art supplies to my online shopping cart. Soon, my storage bins became crowded with blank dot-grid books of various sizes, stickers, stencils, colorful brush pens, fine liner pens, cutting mats, stamps, ink pads, stationery paper, washi tape, corner-cutting tools, knives, tweezers, glue sticks, glue dots, glue pens…
My Instagram account, formerly dominated by watercolorists, embraced travel art journal users and bullet journalers. I began watching anyone who included the word “plan” in their account name. I had to examine what this world offers and learn the secret of easily peeling the back off the stickers.
I’m no expert, and my amateur attempts at duplicating the examples I see are laughable, but I’m embracing the fun aspect of learning new skills.
If you want to know more about the process, keep reading. What follows is a comprehensive overview of the BUJO—or Bullet Journal—world.
What Are Bullet Journals?
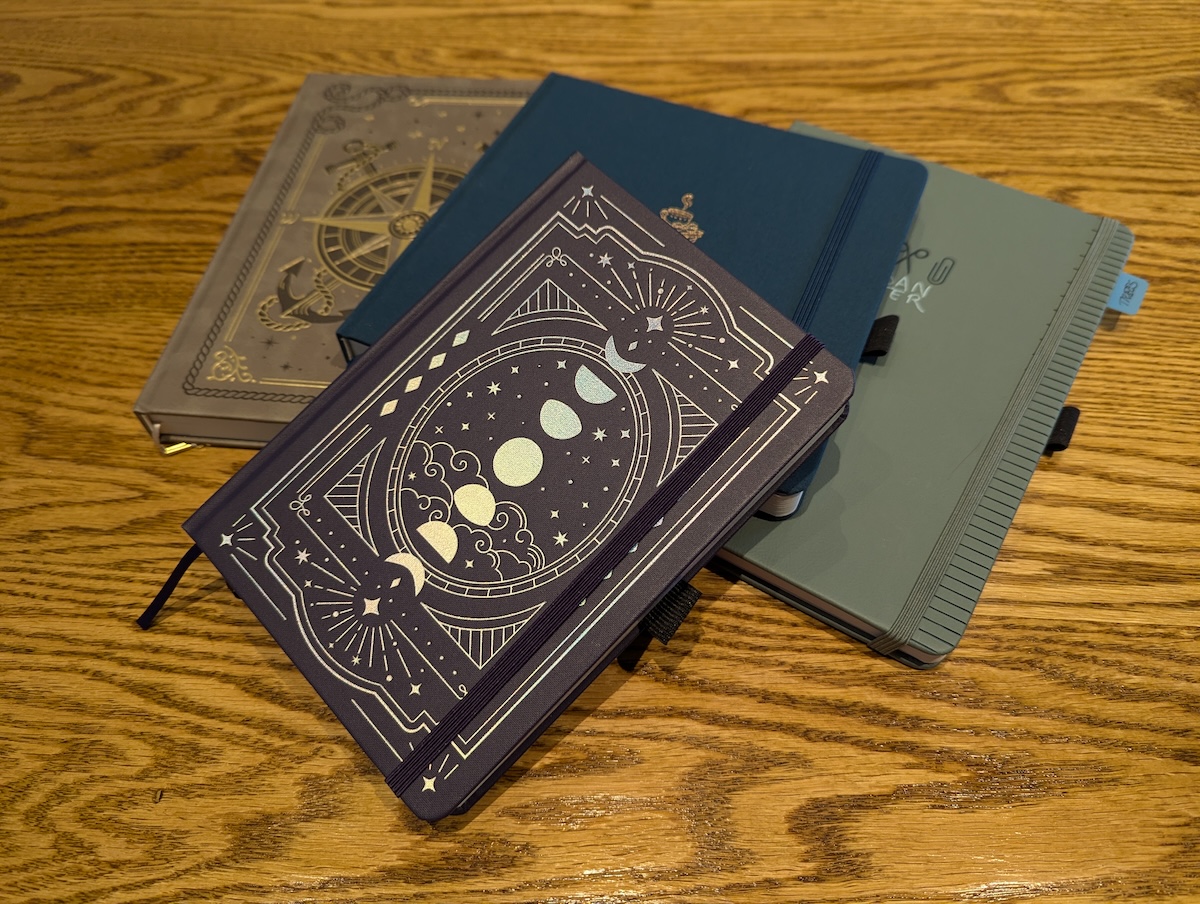
Bullet journals are blank notebooks that people transform into personalized planners, diaries, and trackers. They use a system of calendars, bullets, short phrases, and simple symbols to log information quickly. Digital product designer Ryder Carroll developed the system to keep his ideas organized, and his method has gained popularity for managing tasks, goals, and ideas.
The Art of Organization: Where Function Meets Beauty
At its heart, the art of organization in bullet journaling is about creating a system that keeps you on track and inspires you to engage with your plans and goals—finding a balance between structure and flexibility, productivity, and creativity. As you develop your system, you’ll find that organizing becomes a meditative and enjoyable process, turning planning into a form of self-care and personal expression.
Here’s how you can master this art:
Index and Numbering
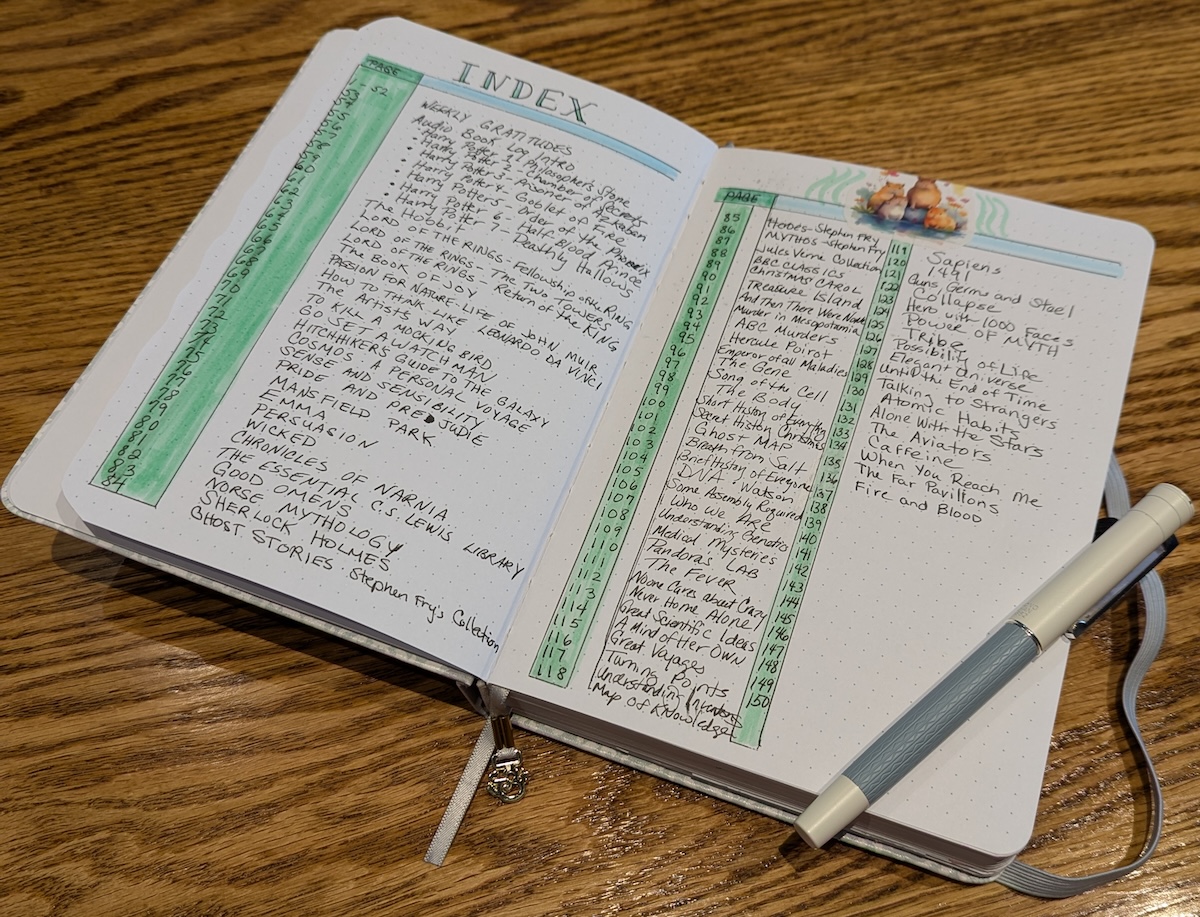
Maintain an index at the front of your journal and number your pages. This simple system ensures you can always find what you need, no matter how creative or complex your journal becomes. I messed this one up right away. I should have given myself an extra page as the index kept growing.
Signifiers and Keys
Develop a set of symbols or icons to mark the status or nature of tasks quickly. For example, you could use a star for priority items, a circle for events, or an exclamation mark for important notes. Create a key page to remember your system and put it in your index section.
Personalized Layouts
Every person’s needs are unique, and bullet journals shine in their adaptability. Experiment with different layouts—weekly spreads, monthly overviews, or daily pages—until you find what works best. The beauty lies in the freedom to adjust your system as your life evolves. I’m still dialing this advice in. I currently have three books that I’m updating since I’m not sure which layout will work best for me.
Collections
Create dedicated pages—or collections—for specific topics or projects. These collections can house everything from book lists and travel plans to long-term goals and project brainstorms. The key is to make these pages both functional and visually engaging.
Color-Coding
Introduce a color system to categorize tasks, events, or areas of your life. This visual shorthand allows you to grasp the nature of your commitments at a glance. For instance, blue could be used for work tasks, green could be used for personal errands, and purple could be used for social events. As an introvert, I don’t need the green or purple since I rarely venture out on errands and don’t plan social events.
Habit Trackers
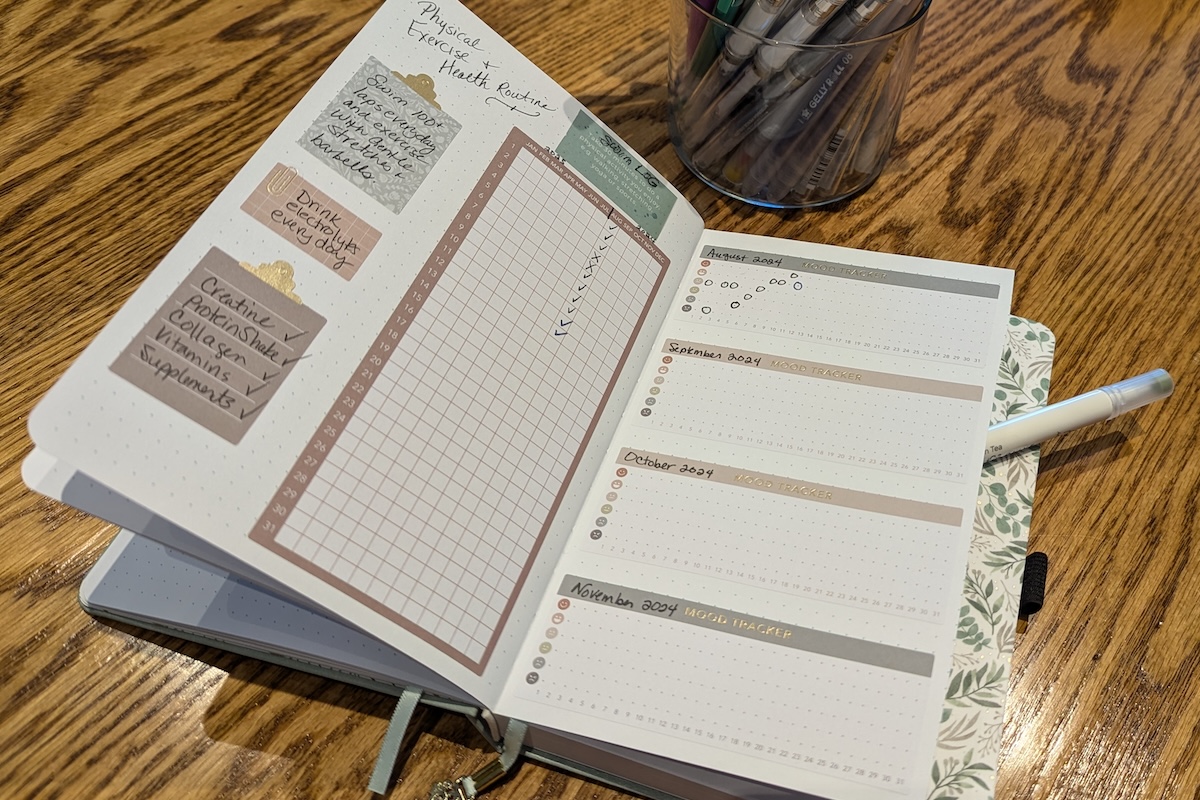
Design visually appealing habit trackers to monitor and encourage positive behaviors. These can be anything from drinking enough water to practicing mindfulness. I have included a Swim Log in my book since I try to exercise in my pool every day. Watching the tracker fill up over time provides a satisfying visual representation of progress.
Migration
Embrace the practice of “migration”—moving unfinished tasks forward to new pages or reassessing their relevance. This keeps your journal current and prevents you from getting bogged down by outdated to-dos. Since I’ve started several books simultaneously, I’m jumping from one book to the next to keep them updated. I won’t make this mistake for BUJO No. 4.
Chapter Topic Ideas for Bullet Journals
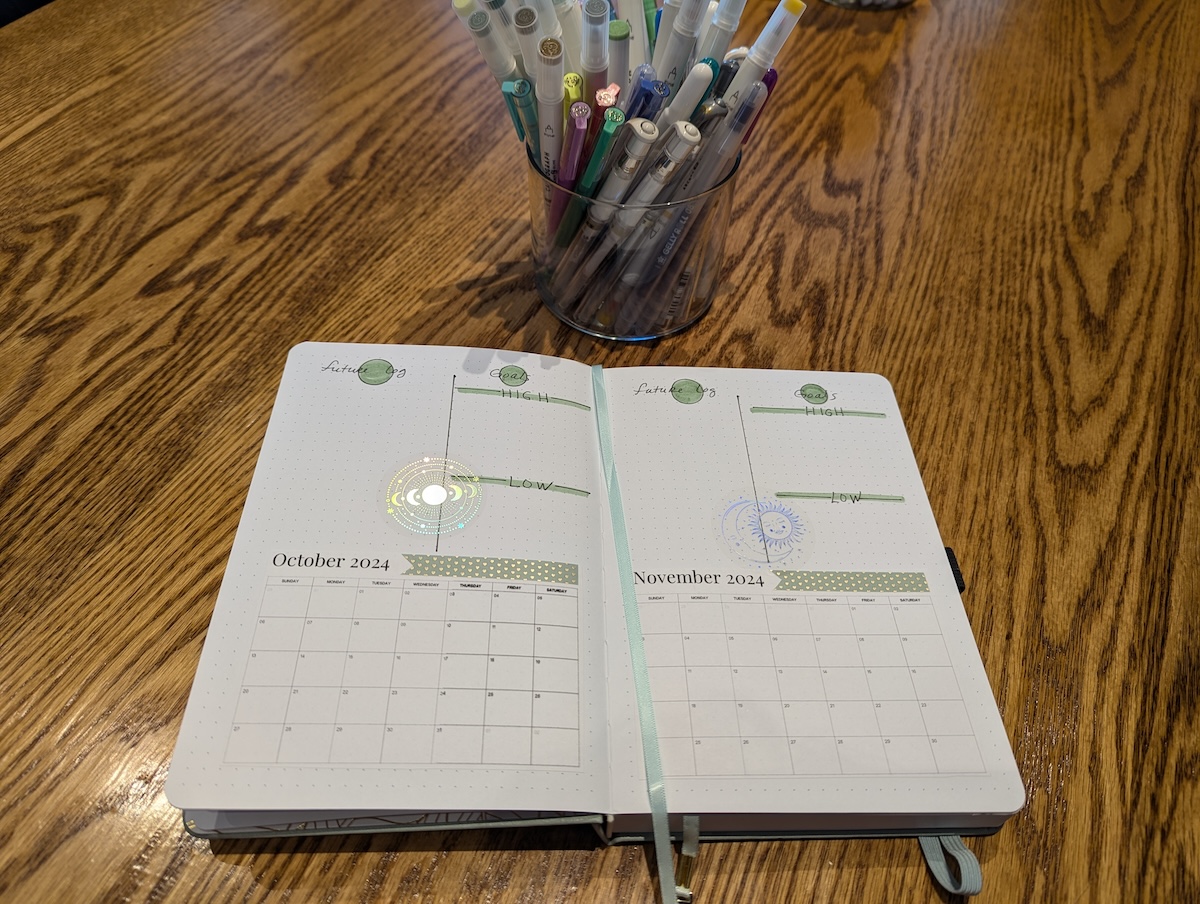
Because I was so excited to get started, I didn’t think about how to create chapters in my bullet journal. I am learning that these chapters represent different aspects of my life. Don’t do the same. Consider designing each section to create a visual language that speaks to that area.
Here’s an expanded look at how to design chapters:
Work and Projects
Layout: Create structured grids and timelines using fine-line black markers for a clean, professional look.
Color Scheme: For a polished feel, stick to a limited palette of muted colors like navy, gray, and burgundy.
Elements: Include mini calendars, project trackers, and goal-setting pages.
Embellishments: Use geometric shapes and minimalist icons to maintain a sleek appearance.
Personal Goals
Layout: Design more fluid, open layouts for reflection and growth.
Color Scheme: Employ watercolor brush markers in soft, inspiring hues like pastels or earthy tones.
Elements: Incorporate vision boards, habit trackers, and motivational quotes.
Embellishments: Add stickers of flowers or leaves for a natural, organic feel.
Hobbies and Interests
Layout: Create playful, asymmetrical designs that reflect the joy of your pastimes.
Color Scheme: Use vibrant, bold colors that capture the excitement of your interests.
Elements: Include logs for books read, movies watched, or skills learned.
Embellishments: This is where washi tape and doodles can truly shine.
Health and Wellness
Layout: Design calming, spacious layouts that encourage mindfulness.
Color Scheme: Use soothing blues, greens, or warm, comforting tones.
Elements: Add meal planners, exercise logs, and mood trackers.
Embellishments: Incorporate mandalas or zentangles for a meditative touch.
Finance
Layout: Create structured tables and charts for clear financial tracking.
Color Scheme: Use green accented with neutral tones for a focused feel.
Elements: Include budget trackers, savings goals, and expense logs.
Embellishments: Use simple line drawings of coins or bills as subtle decorations.
Travel and Adventures
Layout: Design layouts that evoke maps and journeys.
Color Scheme: Use a diverse palette inspired by different destinations.
Elements: Create packing lists, itineraries, and souvenir collection pages.
Embellishments: Add travel-themed washi tape, ticket stubs, stickers, and small sketches of landmarks.
Creativity and Learning
Layout: Design open, free-form layouts that encourage brainstorming and exploration.
Color Scheme: Use a rainbow palette to represent the full spectrum of creative thought.
Elements: Include skill progress trackers, idea banks, and learning logs.
Embellishments: Experiment with mixed media, collage, or your own artwork.
Designing Bullet Journal Chapters
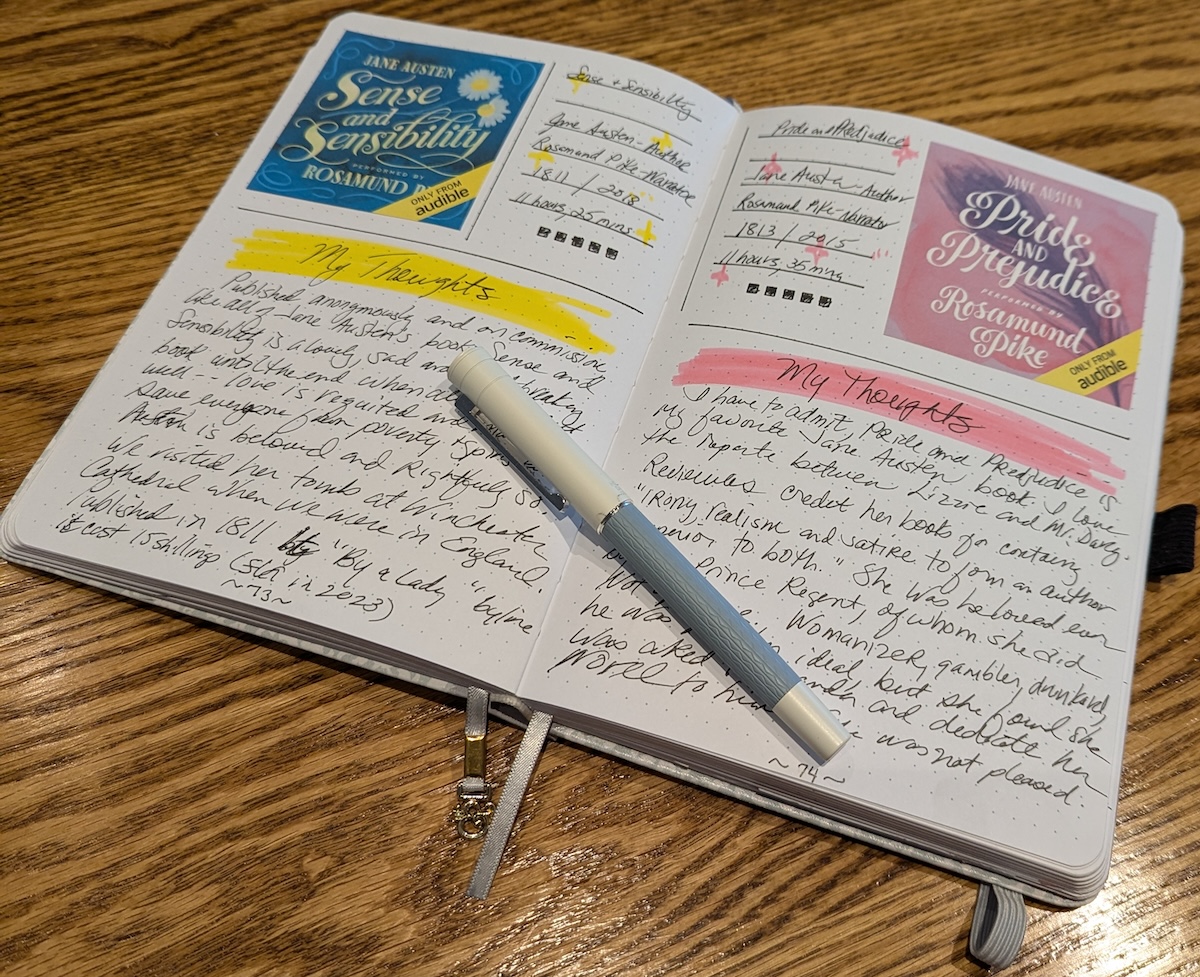
I hope you’re still reading and haven’t jumped into your journal with all the crafty things spread about you!
Before using the elements and embellishments mentioned above, think about creating cohesion across your bullet journal chapters. By weaving a visual narrative, you ensure that while each section is unique, your journal feels unified. It’s too late for my first few books, but this is what I plan to do for BUJO No. 4.
Here’s how to achieve this balance:
Consistent Color Palette: Choose an overarching color scheme for your entire journal, and assign specific colors to each chapter, ensuring they complement the main palette. Use these colors consistently in each chapter’s headers, borders, and accents.
Unified Typography: Select a primary font or handwriting style for headers across all chapters. Choose complementary fonts or handwriting styles for subheads and body text, and create a typography guide page to maintain consistency.
Recurring Motifs: Develop a set of icons or symbols that represent each chapter and use these motifs in chapter title pages and as small accents throughout. Consider a unifying theme (e.g., nature, geometric shapes) across chapters.
Standardized Layout Elements: Design a consistent header or footer for all pages. Use similar page numbering styles throughout, and maintain consistent margins and grid systems across chapters.
Transitional Pages: Create buffer pages between chapters that blend elements from both. Use these pages to shift color schemes or design styles gradually.
Signature Borders: Design a set of borders that can be used across all chapters. Vary the colors of these borders to match each chapter’s theme.
Consistent Use of Materials: If you use washi tape, choose a core set that appears throughout the journal. Select a primary set of markers or pens to use across all chapters.
Chapter Tabs or Dividers: Create visually distinct but stylistically similar tabs for each chapter. Use these for easy navigation while maintaining visual cohesion.
Repeating Patterns: Develop a set of background patterns adapted to each chapter’s theme. Use these patterns sparingly to tie different sections together.
Consistent Mood and Tone: While each chapter may have its own feel, it should maintain a consistent overall mood. This could be minimalist, whimsical, vintage, or any style that resonates with you.
Unifying Framework: Create a template for chapter title pages and use it consistently. This might include a specific layout, title style, and decorative elements.
Cross-Chapter References: Design a system of cross-references that visually link related items in different chapters. This could be through color-coding, symbols, or page number styles.
Seasonal or Thematic Variations: If your journal spans a long period, consider subtle seasonal changes that affect all chapters. This creates cohesion while allowing for natural evolution in your designs.
Consistent Review and Reflection Pages: Design standardized monthly or quarterly review pages that appear in each chapter. These act as anchors, tying the journal together at regular intervals.
How to Use Washi Tape in Your Bullet Journal
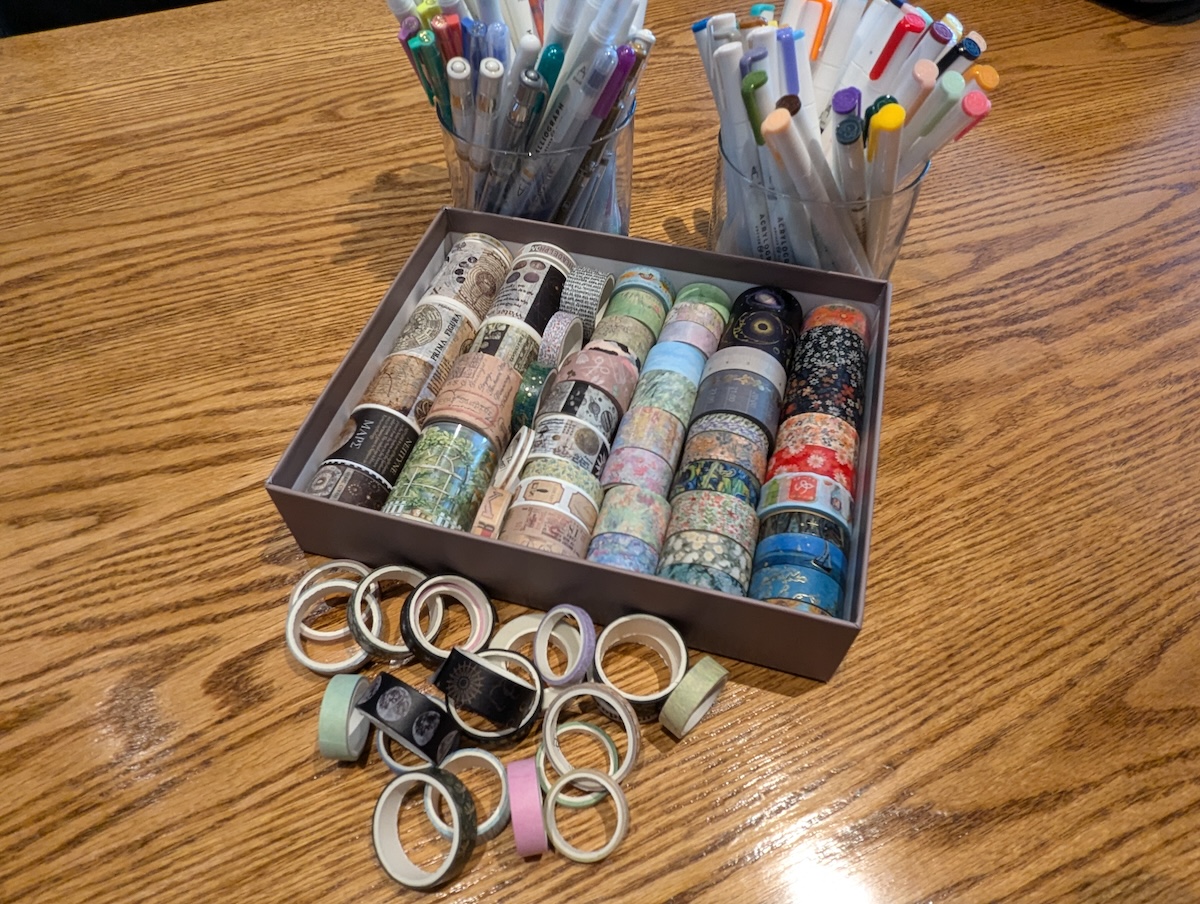
Originally from Japan, washi tape has become a staple in the bullet journaling community. Its versatility, ease of use, and wide array of designs make it an indispensable tool for journal enthusiasts. Silly me—I was using my washi tape on the borders of my watercolor paper as if it were masking tape used to create crisp lines between my painting and the edge. Once the painting was dry, I peeled up the washi tape and tossed it. I didn’t realize it had a different purpose. I didn’t think to leave it on the paper and consider it an embellishment.
The magic of washi tape lies in its ability to instantly add color, pattern, and texture to your bullet journal pages. It’s a low-pressure way to decorate and organize, perfect for seasoned artists and those just starting their bullet journal journey. With creativity, washi tape can elevate your journal from functional to fantastical.
Here’s an expanded look at how to use washi tape in your bullet journal:
Borders and Dividers: Create instant page borders by running washi tape along the edges. Use thin strips to separate different sections on a page, and layer different patterns and widths for more complex borders.
Headers and Titles: Use wide washi tape as a background for page titles. Cut the tape into banner shapes for eye-catching headers or layer different tapes to create unique title designs.
Decorative Backgrounds: Create patterns by laying down strips of washi tape at angles. Use it to cover entire pages for instant themed backgrounds or tear the tape for a more organic, textured look.
Color Coding: Assign different washi tape patterns to various categories in your journal. Use small pieces of tape as colorful bullet points, or create a key using the tape to explain your color-coding system.
Tabs and Bookmarks: Create easy-to-flip tabs by folding washi tape over page edges. Use decorative scissors to cut washi tape into unique tab shapes, and make removable bookmarks by sticking the tape to paper clips.
Framing Elements: Use washi tape to create frames around important notes or quotes. Make photo corners with washi tape to display pictures or ephemera, and create washi tape polaroid frames for a vintage look.
Calendar Embellishments: Highlight important dates with small washi tape flags. Create a tape grid for monthly layouts, and use patterned tape to mark weekends or holidays.
Mood Trackers: Design mood trackers using different washi tape patterns for each emotion. Create a color scale for more nuanced mood tracking.
Habit Trackers: Use small pieces of washi tape to mark completed habits, or create colorful habit tracker grids using tape strips.
Pocket Creation: Make small pockets by folding washi tape and adhering it to pages. Use these pockets to store small mementos or extra notes.
Layering and Texture: Layer different washi tapes for added depth and texture. Combine matte and glossy tapes for interesting visual effects.
Washi Tape Collages: Create entire illustrations using only washi tape, or combine tape with other media for mixed-media art pages.
Customizing Plain Elements: Use washi tape to decorate plain pens or pencils. Cover the spine of your journal with washi tape for a personalized touch. Use the tape on a bookmark and then laminate or use packing tape to protect it.
Correcting Mistakes: Use washi tape to cover up mistakes or unwanted elements in your journal. This allows for easy fixes without ruining your page layout.
Seasonal Themes: Switch up your washi tape selection to match the seasons or holidays. Create themed collections using season-specific tape designs.
5 Tips for Working with Washi Tape
- Keep scissors, an X-ACTO blade, or a tape dispenser handy for clean cuts.
- Test the tape’s adhesive strength on a separate page to avoid damaging your journal.
- Store your washi tape collection in a clear container for easy access and inspiration.
- Don’t be afraid to mix and match patterns and widths for unique effects.
- Remember that washi tape is removable and repositionable, allowing for experimentation!
Creative Additions to Bullet Journaling
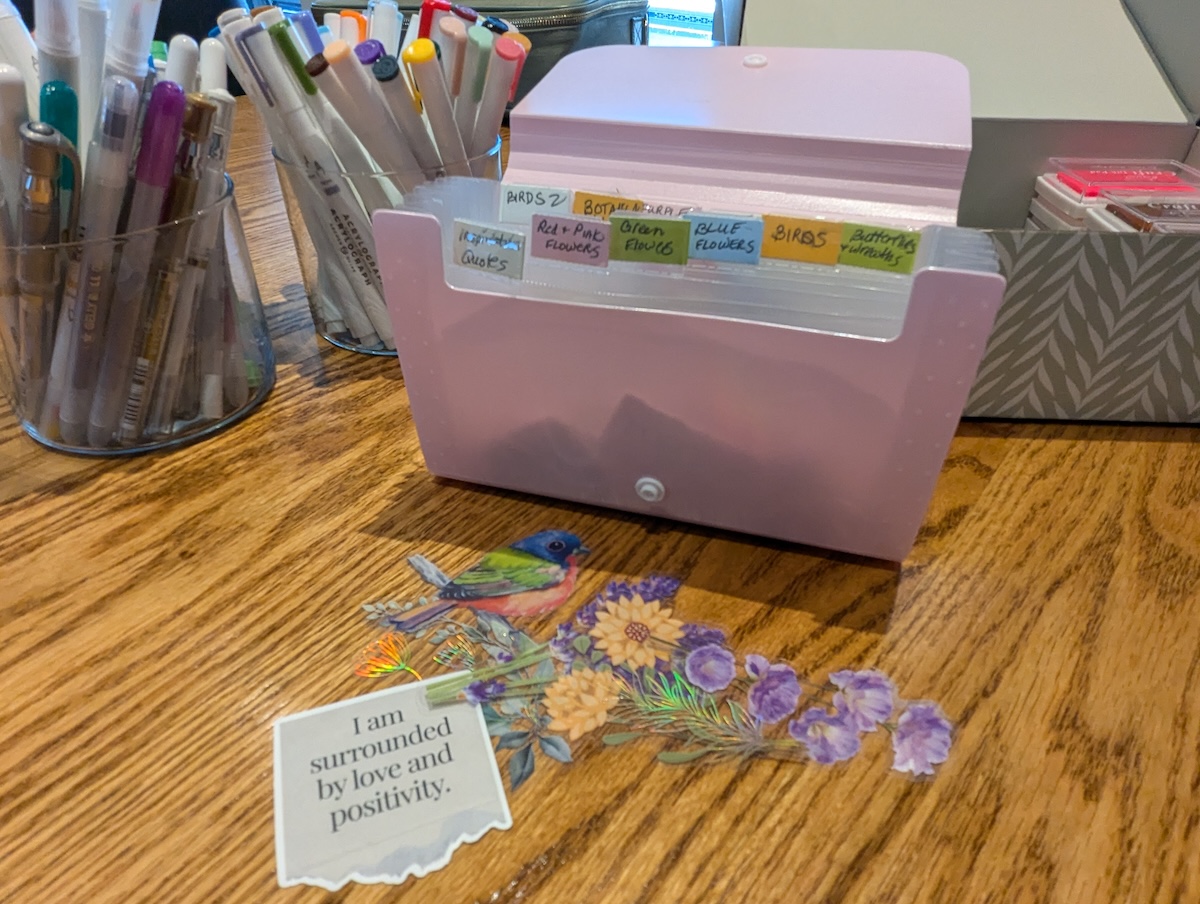
Some artists like to create Junk Journals, but I’m not interested in that reportage style. But if you like the look and feel of a junk journal, these additional aspects can add depth and variety to your bullet journaling practice, allowing for more personalization and creativity. They encourage exploration beyond traditional planning and organization, turning your journal into a multifaceted tool for self-expression, learning, and personal growth.
For example, I created a journal for a museum research project I’m helping develop. I created stickers of architectural drawings of exhibits and used my art pens to sketch visuals. I am using another journal as a diary for the main character of a YA novel I am writing. This one incorporates steampunk elements and is set in the mid-1800s, so I printed vintage newspaper clippings of historical events that the character encounters.
I have a self-care journal, a gratitude journal, and one featuring audiobook reviews since these books aren’t visible on my bookcase. I like the idea that there’s room for creative additions, and here are a few that I may try in my notebooks:
Interactive Elements
- Creating flip-ups or fold-out sections for hidden information
- Designing spinner wheels for decision-making or tracking
- Adding envelope pockets for storing ephemera or additional notes
Mindfulness and Self-reflection
- Incorporating guided journaling prompts
- Creating mandalas or zentangles for stress relief
- Designing meditation logs or gratitude spreads
Data Visualization
- Creating unique infographics to represent personal data
- Designing creative pie charts or bar graphs for goal-tracking
- Using visual metaphors to represent progress (e.g., growing plants)
Theme-based Journaling
- Designing entire journals around a specific theme (e.g., space exploration, vintage travel)
- Creating monthly themes that influence layout and decoration choices
- Incorporating elements from pop culture or literature into your designs
Incorporating Photography
- Using instant cameras to add photos directly to your journal
- Creating photo collages to represent memories or goals
- Designing layouts that blend sketches with photographs
Storytelling and Memory Keeping
- Using comic-style layouts to document events
- Creating illustrated timelines of important life moments
- Designing “day in the life” spreads with detailed illustrations
Exploring Calligraphy and Lettering
- Incorporating different lettering styles for headers and quotes
- Creating entire spreads focused on practicing calligraphy
- Designing custom alphabets for your journal
Seasonal and Nature Journaling
- Creating trackers for plant growth or bird watching
- Designing spreads that change with the seasons
- Incorporating pressed leaves or flowers into your layouts
Music and Sound Integration
- Designing creative playlist trackers
- Creating visual representations of favorite songs or albums
- Incorporating sheet music into your designs
Cultural Exploration
- Dedicating spreads to learning new languages
- Creating layouts inspired by different cultural art styles
- Designing travel-inspired spreads for armchair exploration
Scientific and Educational Elements
- Incorporating diagrams or sketches to aid in learning
- Creating spreads dedicated to documenting experiments or observations
- Designing layouts that explain complex concepts visually
A Few Fun Supplies for Bullet Journaling and Art
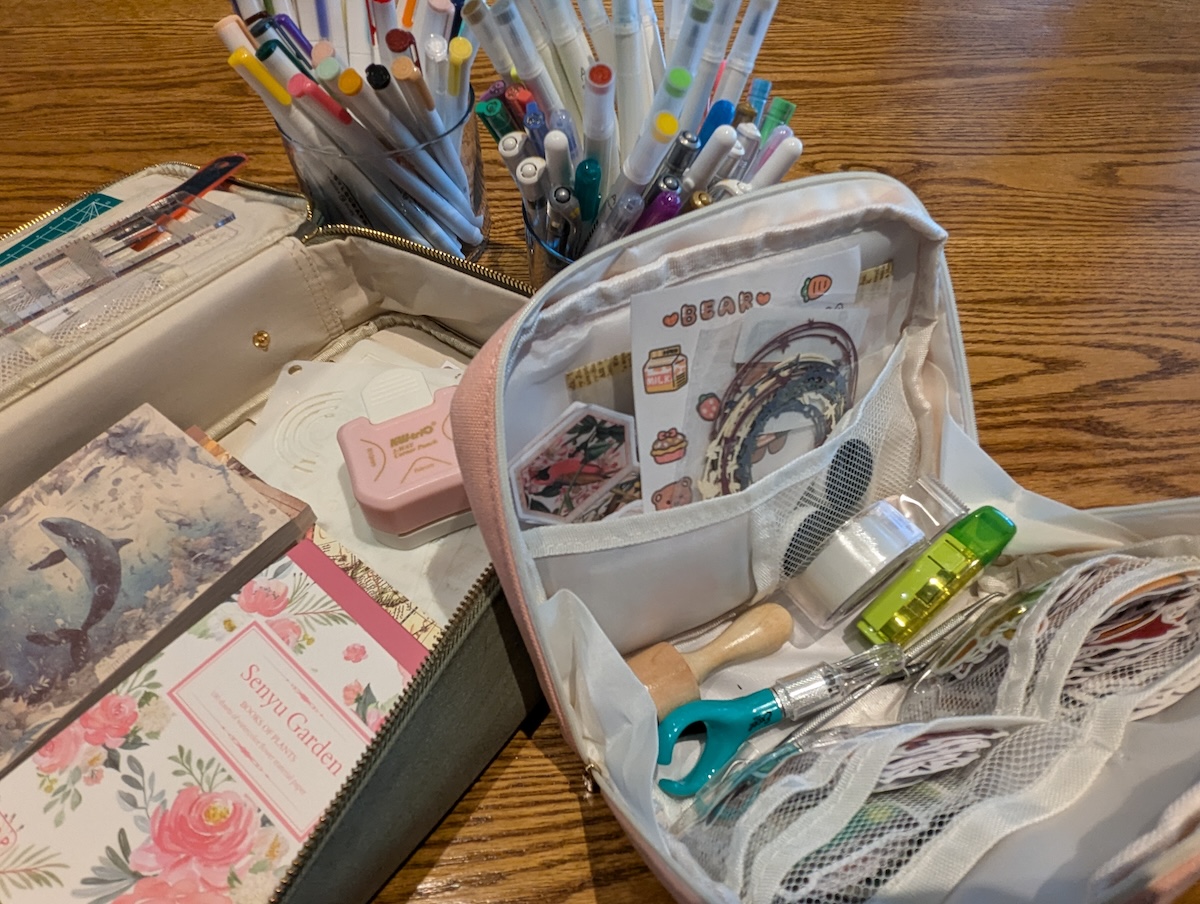
Here are just a few of the art supplies I use for my bullet journals and other journals:
Books
- The Laws Guide to Nature Drawing and Journaling
- How to Journal Like an Artist: A Beginner’s Guide to Keeping a Sketch Journal
Cases & Caddies
- Accurasee Sketch Caddie
- Heavy Duty Tool Bag 15-Inch, 16-Pocket Tote
- DIYOMR 24/36/72 Slots Pencil Wrap Pencil Rolls
- KOKUYO Neo Critz Pen Case, Large Size
- Loustni Collapsible Travel Cup
Sketch Pads and Journals
- U.S. Art Supply 5.5″ x 8.5″ Watercolor Book
- MEEDEN 10X7″ Cotton Watercolor Paper Block
- Scribbles That Matter A5 Dotted Journal Notebook
Pencils, Pens, and Paints
- Pentel® Sharp™ Automatic Drafting Pencils, 0.9 mm
- Derwent Inktense Pencils Tin, Set of 12
- Castle Art Supplies 72 Colored Pencils Set
- Faber Castell F110012 Polychromos Colour Pencils
- SAKURA Pigma Micron Fineliner Pens – Archival Black Ink Pens
- Uni-Ball UM 153 Signo Broad Point Gel Pen – White
- Faber-Castell Pitt Artist Pen
- Hongdian 1862 Fountain Pen, Iridium Fine Nib with Ink Converter
- Uni-ball 207 Retractable Gel Pens Medium Point, 0.7mm, Black, 12 Pack
- Tombow 56189 Dual Brush Pen Art Markers
- Derwent Push Button Waterbrush Assorted Set
- Derwent Inktense Paint 12 Pan Palette
- Kuretake Zig Watercolor System Brush2O
- Daniel Smith Watercolor: Jean Haines Master Artist Set 10 Watercolor Tubes
- Derwent Graphitint Paint 12 Pan Palette
- Derwent Inktense Paint 12 Pan Palette
- Winsor & Newton Cotman Watercolor Paint Set
Bullet Journalers to Follow
While it’s great to draw inspiration from others, the true beauty of bullet journaling lies in creating a system that works uniquely for you. But, if you’re like me and you’re totally new to bullet journaling, having YouTube and Instagram can be a big help. I’ve spent most of my life in the black-and-white world of the writer, never adding color or expression beyond the occasional exclamation point. Because of this, I’ve made it my mission to find and follow many creative people in my quest to learn all things arty-farty.
Perhaps you’re already following artists who inspire you. If not, consider this list of people popularizing and developing the bullet journal world:
- The original creator of the Bullet Journal method
- Author of The Bullet Journal Method
- Known for his minimalist approach
- Popular for her colorful and artistic spreads
- Offers courses and products related to bullet journaling
- YouTube creator known for her artistic and aesthetically pleasing designs
- Offers monthly plan-with-me videos and stationery reviews
- Known for her clean layouts and informative posts about productivity
- Member of a the Planner Pals podcast along with Mark Your Pages
- Creates themed monthly spreads often inspired by nature and literature
- Illustrator making videos about bullet journaling
- Operates a stationery shop with monthly themes and journaling kits
- Not a single person, but a stationery store with an affection for East Asian culture and a mission to create a space for everyone to feel more creative and at peace. Every product aims to bring you joy and calm in your brightest and darkest moments.
- Not a single person, but a stationery store launched by Bonnie Kuhl, who struggled to prioritize mental wellness while navigating the day-to-day. Once she discovered that art and journaling helped her feel more in control of her mental health, she set out to share this with as many people as possible.
And a few ladies making BUJOs, selling stickers and more on Instagram:
- Amy @amyplansthings
- Louise @doodlelou.co
- Karine @planningwithk
- Elena @ohnoelbujo
- Mandy @mandyjournals
- Bumble (Okay, so Bumble is her dog) @planningwithbumble
Over to you! If you’ve gotten into bullet journaling, what are your favorite layouts, themes, and tips for fellow journalers? Share your ideas and advice with the Frayed Passport community!
About the Author
Robin Van Auken, MA, RPA, is the CEO of Hands-on Heritage. She is an anthropologist and registered professional archaeologist (National 15069). She specializes in working with communities, galvanizing individuals to contribute their memories, photographs, and artifacts to develop legacy projects. Through in-depth, sensitive interviews, she learns the important stories that connect people through time and space. Robin especially enjoys the challenge of hunting for historic photographs and artifacts that highlight America’s history. As a professional archaeologist, she has directed multi-year public cultural heritage projects, working with hundreds of volunteers and educating thousands of visitors.
Images courtesy of the author.
Information published on this website and across our networks can change over time. Stories and recommendations reflect the subjective opinions of our writers. You should consult multiple sources to ensure you have the most current, safe, and correct details for your own research and plans.
Frayed Passport is a participant in the Amazon Associates Program, an affiliate advertising program designed to provide a means for sites to earn advertising fees by advertising and linking to Amazon.com. We also may share links to other affiliates and sponsors in articles across our website.
